Thanks to our own toolbox, we can already paint a scene, but let's not rush it. First, let's create a new tool. This time, it won't be a developer tool, but a scene designer tool.
The right scale
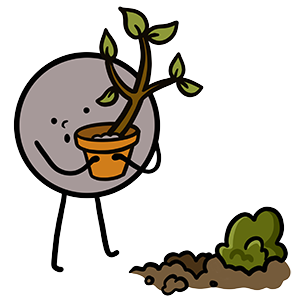
In the previous chapter, we drew a character by giving it a width and height of 100 pixels. However, pixels can be a bit difficult to understand. They are not like the units of measurement we use in everyday life, such as meters (or feet).
We could convert pixels into meters, but I have a better idea. Let's create our own unit of measurement. For instance, we could use the size of our character as a reference, and this will make it easier to position the other elements of our scene.
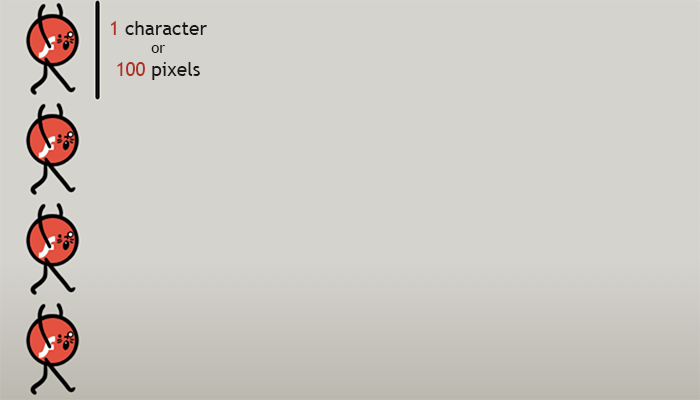
The height of our canvas is 400 pixels, and I would like to stack 4 characters on top of each other. We can therefore assume that 1 character = 100 pixels, so 1 unit can be set to 100 pixels on the canvas scale.
First, let's create our scale tool using the Canvas API.
export function setScale (ctx, scale) {
    ctx.scale(scale, scale)
}
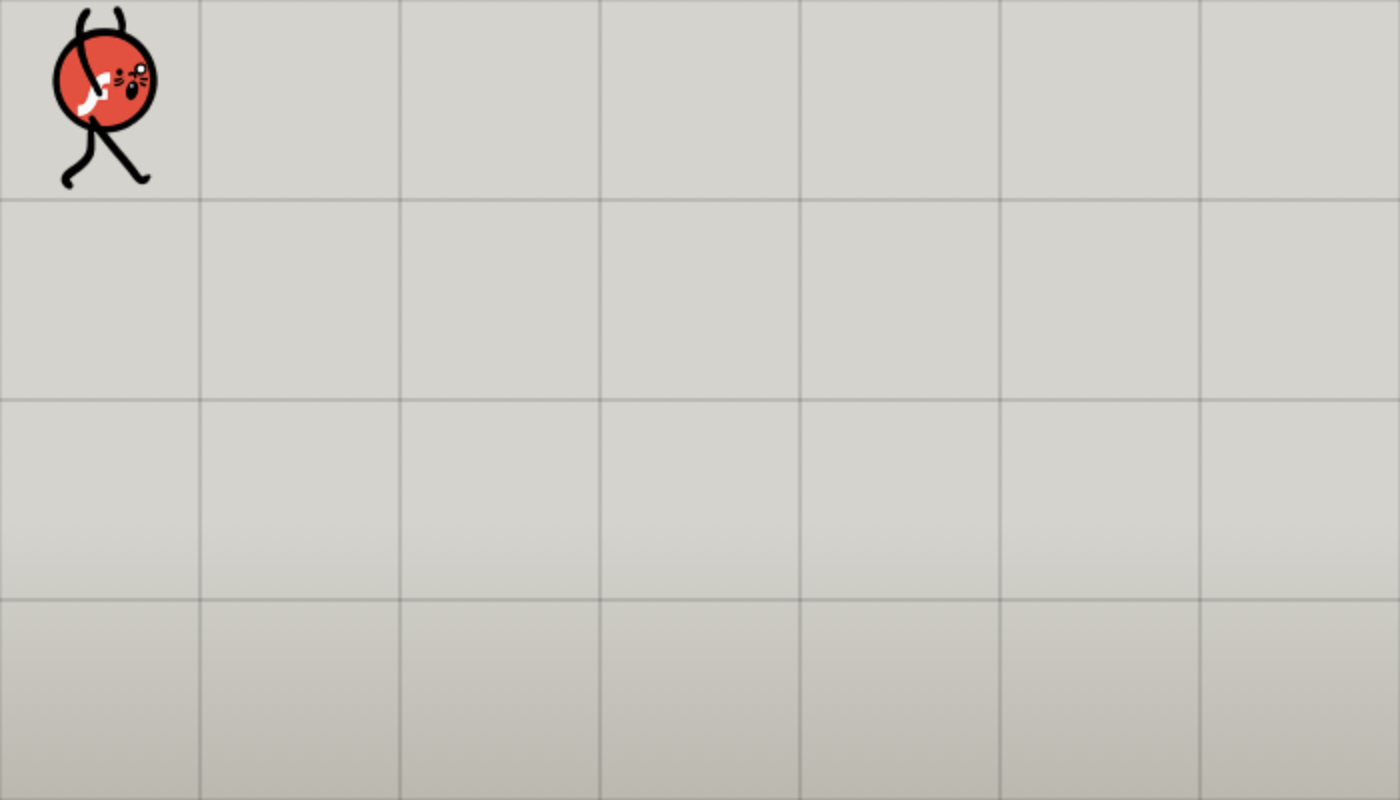
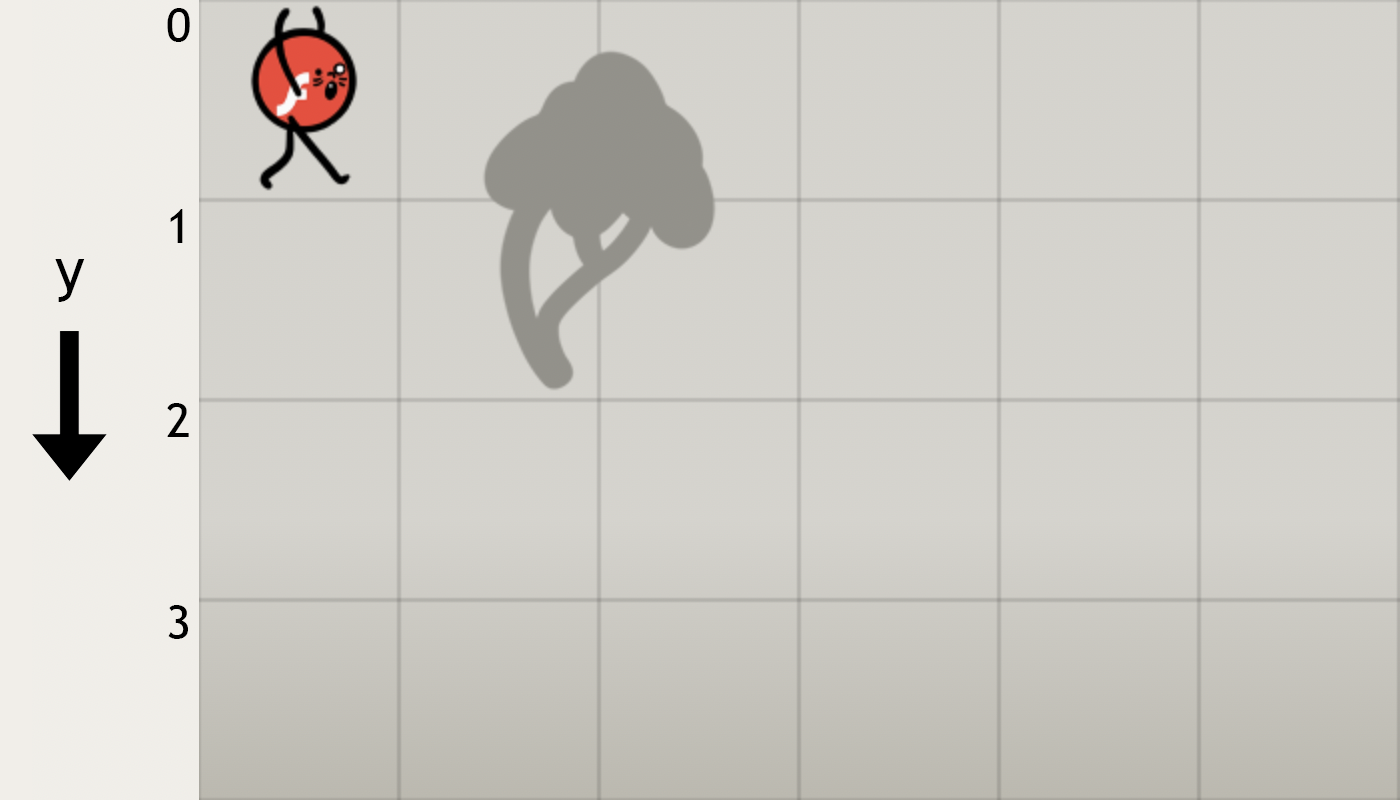
Now, we can draw the character by giving it a width and height of 1. Let's also draw a square of the same size behind it to see the boundaries of the image.
setScale(ctx, 100)

const heroImage = await loadImage('images/hero_run_01.png')

drawRectangle(ctx, {
    x: 0,
    y: 0,
    width: 1,
    height: 1,
    color: 'orange'
})

drawImage(ctx, {
    x: 0,
    y: 0,
    width: 1,
    height: 1,
    image: heroImage
})

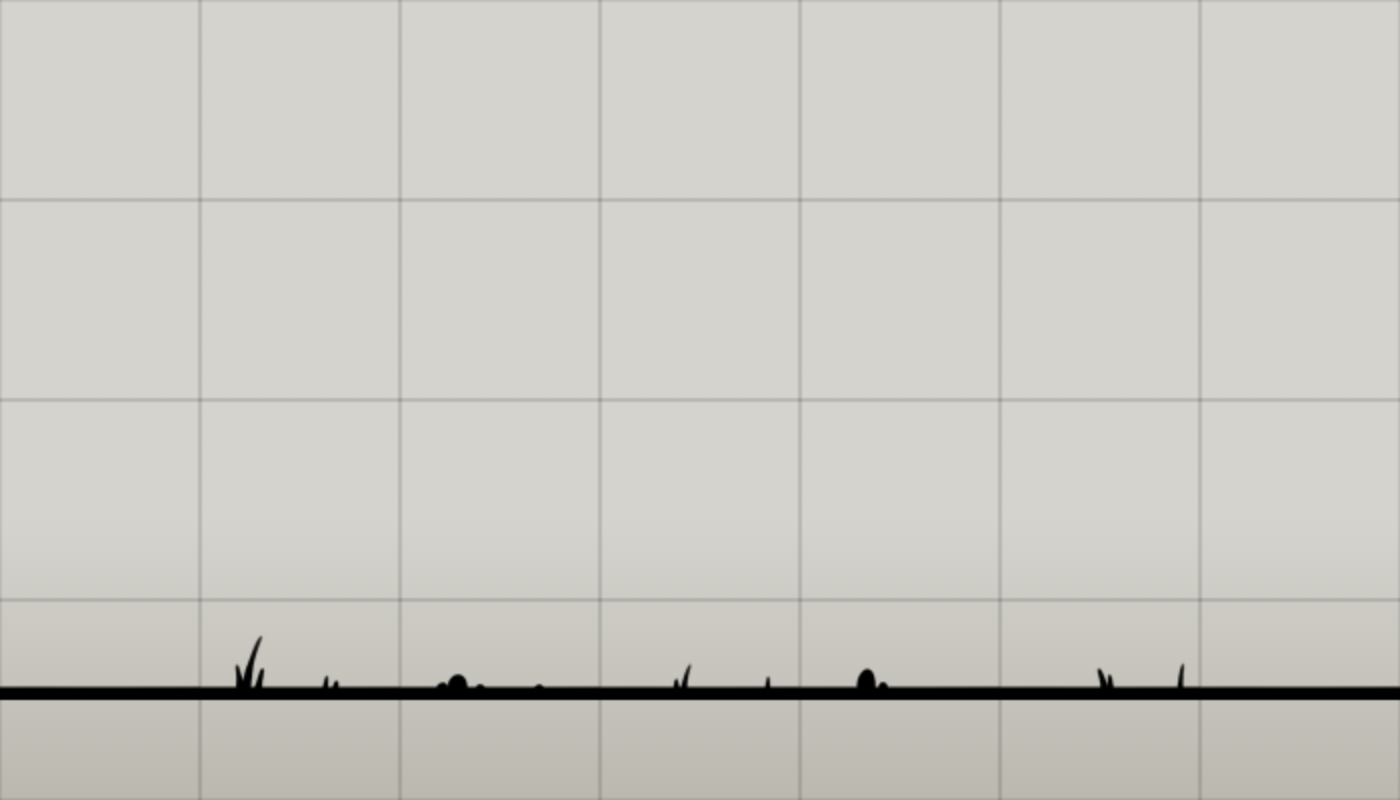
Draw a grid
Now that we have defined a scale, I think it can be very helpful visually to display a grid.
To achieve this, we will use the lineTo method of the Canvas 2D API. This method allows us to draw a line between two points. To draw a grid, we will therefore draw vertical and horizontal lines.
export function drawGrid (ctx) {
    const {width, height} = ctx.canvas
    const cellSize = 1

    ctx.strokeStyle = 'rgba(0, 0, 0, 0.25)'
    ctx.lineWidth = 0.01

    for (let x = 0; x < width; x += cellSize) {
        ctx.beginPath()
        ctx.moveTo(x, 0)
        ctx.lineTo(x, height)
        ctx.stroke()
    }
    for (let y = 0; y < height; y += cellSize) {
        ctx.beginPath()
        ctx.moveTo(0, y)
        ctx.lineTo(width, y)
        ctx.stroke()
    }
}
Once our new tool is in place, we simply need to use it.
setScale(ctx, 100)
It is much easier to position the elements in our scene.
Load all of the images
At the moment, we have only loaded one image, but we will need many more for our project. Therefore, we will create a function that loads all of the necessary images at once. This will greatly simplify the process.
We can simply reuse our loadImage tool and loop through a collection of images. This will enable us to load all of the necessary images with minimal effort.
export async function loadImages (collection) {
    const images = {}

    for (let name in collection) {
        images[name] = await loadImage(collection[name])
    }

    return images
}
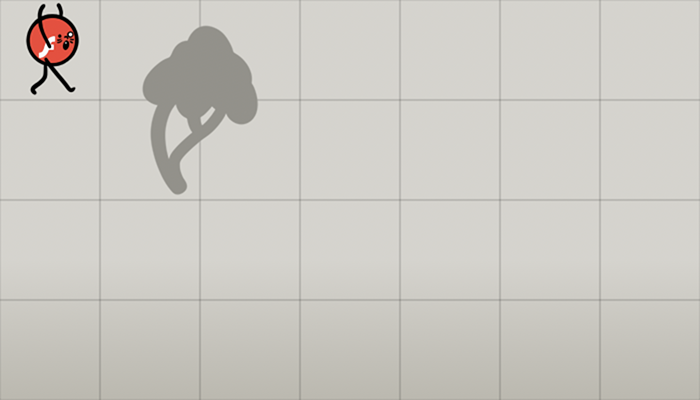
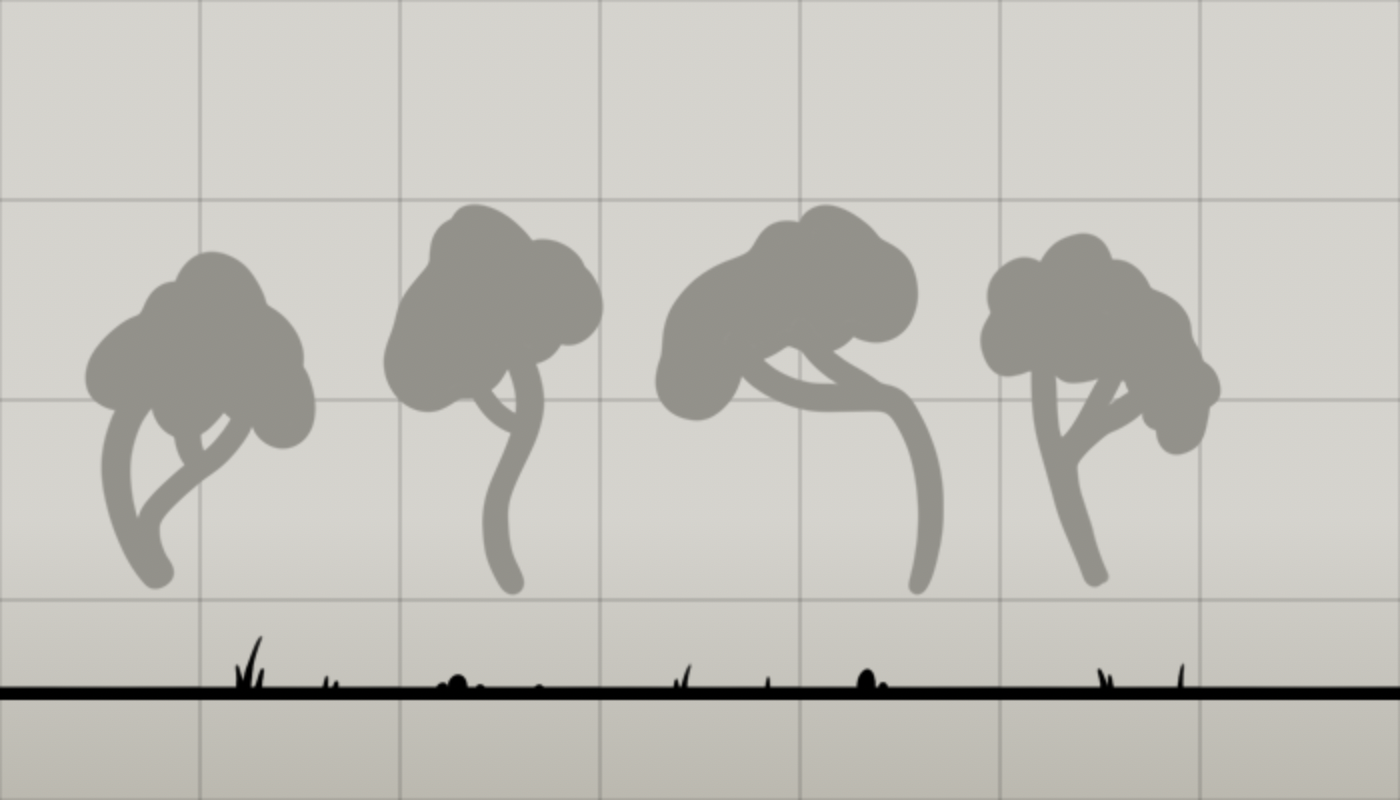
We can use this new function to load two images: the character image and the tree image. And display them side by side to ensure that everything is functioning properly.
const images = await loadImages({
    hero1: 'images/hero_run_01.png',
    tree1: 'images/tree_01.png'
})

drawImage(ctx, {
    x: 0,
    y: 0,
    width: 1,
    height: 1,
    image: images.hero1
})

drawImage(ctx, {
    x: 1,
    y: 0,
    width: 2,
    height: 2,
    image: images.tree1
})
Since there are many files to load, I suggest creating a separate file that lists all of the necessary images. We can then import this file into our main file and load all of the images at once.
const imagePaths = {
    hero1:     'images/hero_run_01.png',
    hero2:     'images/hero_run_02.png',
    hero3:     'images/hero_run_03.png',

    // ... and so on

    tech5:     'images/tech_05.png',
    tech6:     'images/tech_06.png',
    tech7:     'images/tech_07.png'
}

export default imagePaths
What exactly is a scene?
When we code, everything is somewhat arbitrary. There isn't really a "scene" - everything is an abstraction. In the case of our game, we can consider a scene as an object that contains all of the game elements.
Therefore, I suggest creating a scene, in which we can store all of the elements to be displayed.
export default class Scene {

    constructor () {
        this.elements = []
    }

    add (object) {
        this.elements.push(object)
    }

}
We will also need a function that allows us to display the elements of a scene.
export function drawScene (ctx, scene) {
    scene.elements.forEach(element => {
        drawImage(ctx, element)
    })
}
Now, let's connect all of this to our main file (toy.js). This step may not have changed the display itself, but it is an important transition from displaying images on a canvas to displaying elements in a scene. This will unlock new possibilities that we will explore very soon.
    const scene = new Scene()

    scene.add({
        x: 0,
        y: 0,
        width: 1,
        height: 1,
        image: images.hero1
    })

    scene.add({
        x: 1,
        y: 0,
        width: 2,
        height: 2,
        image: images.tree1
    })

    drawScene(ctx, scene)
Let's compose the scene!
We have finally reached the much-awaited step. We can now position our elements in the scene using the grid
Please be aware that on the Canvas API, the Y-axis is "inverted". 0 corresponds to the top of the screen, and as the Y-value increases, the element moves downwards on the screen. Personally, I find this quite confusing, but for this game, we will deal with it.
Let's start by placing the floor. The height of the ground images corresponds to half a cell. We should position it at the bottom of the screen, so a Y position of 3 seems like a good idea. We can always refine this later on. There are several floor images available to choose from.
scene.add({
    x: 0,
    y: 3,
    width: 1,
    height: 0.5,
    image: images.floor1
})

scene.add({
    x: 1,
    y: 3,
    width: 1,
    height: 0.5,
    image: images.floor2
})

// ... and so on
Now, let's place the trees. The trees are a bit more complicated. We will need to make sure that they are not too close to each other.
A tree seems to be about 2 cells high, and since we want to place them slightly above the road, a Y position of 2 seems appropriate. Let's space them out by about one and a half cells each.
scene.add({
    x: 0,
    y: 1,
    width: 2,
    height: 2,
    image: images.tree1
})

scene.add({
    x: 1.5,
    y: 1,
    width: 2,
    height: 2,
    image: images.tree2
})

// ... and so on
You get it. The next step is to do the same for the rest of the elements.
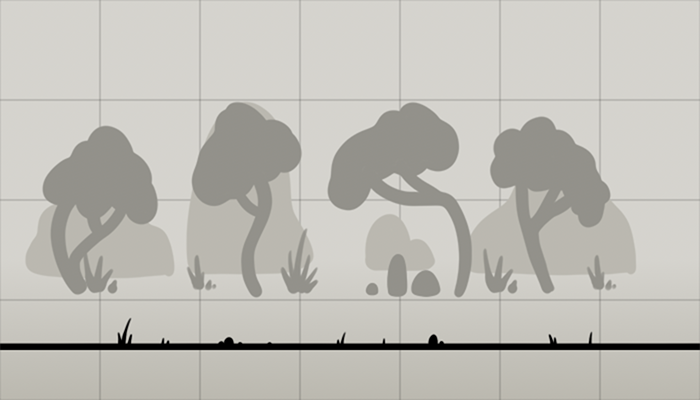
Don't spend too much time on this part - it's just to give you a general idea of how the elements are positioned. We'll revisit this section in a future chapter.
What's new in our toolkit?
- We can now load multiple images at once
- Change the canvas scale to use our own unit of measurement
- Display a grid
- Add elements to a scene
- Draw a scene
We can move on to the next chapter, which will focus on animating the scene.