There are various ways to draw on a web page. The first one that comes to mind is using HTML and CSS. However, there are also more powerful tools such as SVG and Canvas.
When it comes to creating our mini-game, using Canvas is likely the most suitable method. Therefore, it is the approach we will adopt.
Canvas API
As we are not using any framework or library, we will need to use the Canvas API provided by web browsers. However, don't worry, all the functionalities we need are supported by modern browsers these days.
If you are completely new to coding, you might be wondering where to start.
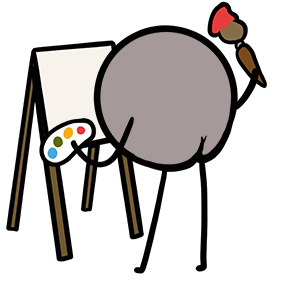
Introducing Silent Teacher and Compute It – two games designed to help you get started with the fundamentals of coding.
In Silent Teacher, you will learn by observation and deduction, while Compute It challenges you to run scripts as if you were a computer.
Give these games a try, you will be surprised at how quickly you can pick up the basics.
And if you ever get stuck on a challenge, remember that a computer is a logical, straightforward creature – it will always do exactly what you tell it to, no more and no less.
So take your time, think things through, and you will get there.
If you open the source code (provided at the end of the previous chapter), you will notice that we already have a <canvas> element in the index.html file.
Our next step is to initialize it using JavaScript. I have created 2 JavaScript files: toy.js and game.js. toy.js will be used to practice and test the tools we will create without cluttering game.js, which will be exclusively dedicated to creating our game.
async function init () {
    const canvas = document.querySelector('#fallen_hero .game_canvas')
    const ctx = canvas.getContext('2d')
}

window.addEventListener('load', init)
Let's draw rectangles
It must be admitted that the Canvas API can be somewhat complex, which is why there are frameworks available to simplify its usage. However, for the purpose of our game, we only require a few basic functions to display rectangles and images.
Let's create a first function that draws a rectangle using the Canvas API.
function drawRectangle (ctx, {x, y, width, height, color}) {
    ctx.fillStyle = color
    ctx.fillRect(x, y, width, height)
}
Having created this function, we can now rely exclusively on it instead of using the Canvas API directly.
This marks the beginning of building our toolbox by creating such tools that will be useful in the future.
Now we can draw some rectangles on the canvas.
drawRectangle(ctx, {
    x: 50,
    y: 50,
    width: 100,
    height: 100,
    color: 'black'
})

drawRectangle(ctx, {
    x: 200,
    y: 50,
    width: 150,
    height: 150,
    color: 'white'
})
You should see two rectangles appear.

Now let's draw some images
Drawing images can be a bit tricky, as we need to wait for the image to load before we can display it.
So, let's start by creating a function to load an image. In addition, we will create a new file named utils.js to store our utility functions.
export function loadImage (path) {
    return new Promise((resolve, reject) => {
        const image = new Image()
        image.src = path
        image.onload = () => resolve(image)
        image.onerror = reject
    })
}
To use this function in toy.js, we need to import it at the top of the file.
import {loadImage} from './utils.js'

const heroImage = await loadImage('images/hero_run_01.png')
Now let's take a look at the Canvas API to draw an image and create our own function as we did for rectangles.
By the way, this is the right time to move our drawRectangle function to the separate file utils.js.
export function drawImage (ctx, {x, y, width, height, image}) {
    ctx.drawImage(image, x, y, width, height)
}
Then we can draw our hero on the canvas.
const heroImage = await loadImage('images/hero_run_01.png')
drawImage(ctx, {
    x: 50,
    y: 50,
    width: 100,
    height: 100,
    image: heroImage
})
Here is the result.

Our progress so far
We have unlocked the following tools:
- Drawing a rectangle
- Loading an image
- Drawing an image
This is all we need to draw the game scene.